

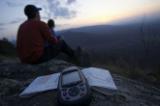
Geotagging Photos
© Jack Looney NW4S5191
If your camera doesn’t automatically insert GPS coordinates into your digital files, there are a few ways to tag your photos manually. The following methods use map-based software that allows you to drag and drop your images onto a location, writing the associated coordinates into the image file. Each option is free and fairly easy to learn.
Google Earth and Geotagger
- Download the applications at:
http://craig.stanton.net.nz/software/Geotagger.html
http://earth.google.com/download-earth.html - Open Google Earth.
- Search for, zoom into and center your location.
- Drop the photo associated with that location onto the Geotagger icon.
- Use a photo browser to check that the coordinates are in the photo’s metadata. (You may need to adjust your preferences to make GPS metadata visible.)
- Use a photo browser to add the rest of the metadata to your image.
Microsoft Pro Photo Tools (Windows only)
- Download the application at: http://www.microsoft.com/prophoto/downloads/tools.aspx
- Open Microsoft Pro Photo Tools
- Drag and drop jpegs from another browser into the MPPT Image window. (The thumbnails you see in the image window represent the originals that still live in their normal folder.)
- Click the Map Browse tab at top of the Image Window.
- Choose one or more of your thumbnails (Now at bottom of map).
- Use the buttons to locate and zoom as close to your location as possible. (Or enter a city, address, place, river, etc in the Search box at the bottom and click Search.)
- Drag the thumbnail onto that point on the map. (Multiple images from one spot can be separated by right clicking on the red marker on the map.)
- The GPS data will be added automatically to the metadata for the image(s).
- Click on the “thumbnails” tab at top of the map to ensure that each thumbnail has a globe icon on it, indicating that it has been geotagged.
- “File/save” the image and proceed to add additional metadata.
- Select individual or multiple thumbnails.
- Add Metadata in the Task Panel on the left by typing into appropriate boxes. (To see a larger version of the image, click on the thumbnail in thumbnail window).
- Use task list at far left to enter metadata to: keyword, description, copyright, website metadata fields.
- “File/save” the image.
Note: The exclamation point icon will appear whenever you’ve added new georeference or metadata without saving